Long Exposure Phone Photography Tip!
Video: Long Exposure Phone Photography Tip! From Shoot to Post
In this article/video, we’re talking about long exposure photography, but there’s a catch. In an effort to help open up our minds regarding the creative process and focus less on the gear, I’m going to walk you through the process of capturing and editing a long exposure image – all on an iPhone 11 Pro Max (you’ll just need a “live photo” feature on whichever smartphone camera you’re using). We’ll also go over how to use this technique on a DSLR and mirrorless camera as well.
How to Shoot a Long Exposure Photo with Your Phone
Step 1: Use a Tripod
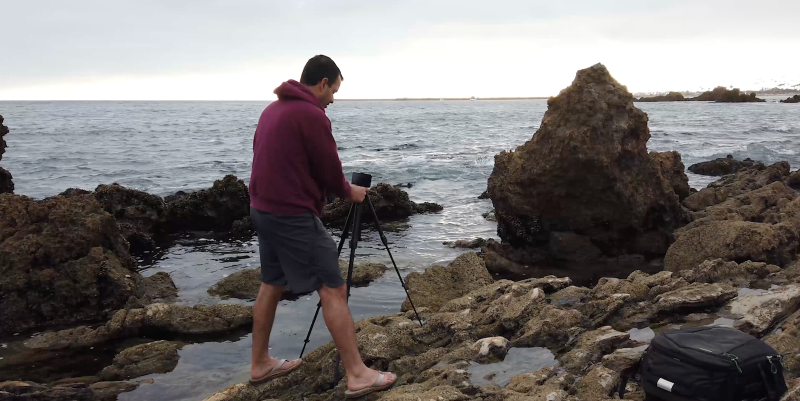
Regardless of whether you’re using a phone or a DSLR or mirrorless camera, you’ll need to use a tripod to stabilize your camera and minimize (or eliminate) camera shake. For this tutorial, I used Peak Design’s Travel Tripod. It’s small and sturdy, and it even comes with a phone adapter that you can pull out of the center column. You can find affordable, low budget tripods online for shooting with smartphones, but I recommend getting a quality tripod like this if you plan to shoot with a DSLR or mirrorless camera.
When shooting a long exposure on a DSLR or mirrorless camera, the shutter will remain open for an extended period of time, which can lead to blurry images if the camera isn’t stabilized. When you use an iPhone, however, the process for capturing a long exposure is a little different. Essentially, the iPhone is blending video footage into a final still. Either way, any movement in the camera will yield a blurry image.
Step 2: Find Your Composition
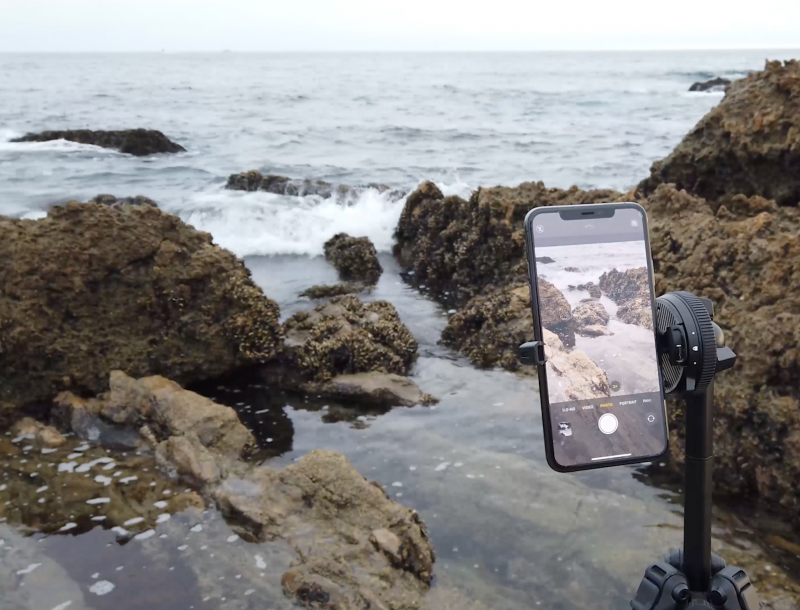
Before you dive into the technical side of things and start adjusting your exposure, focus on your artistry and frame your shot. For the featured image in this article, I was drawn to the rock formations and decided to use those to help find my composition. I wanted the rocks to enclose the action area where the waves would crash through the frame.
Step 3: Adjust the Shutter Speed (or Enable “Live Photo” on Your Phone)
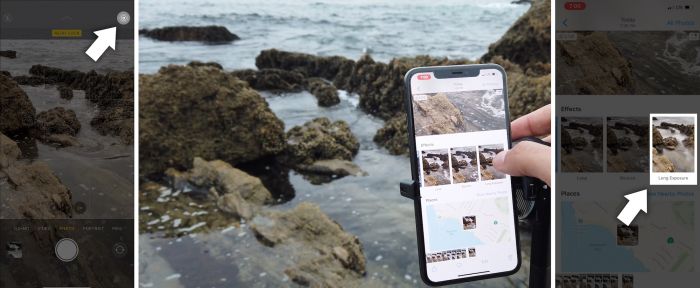
If you’re using a phone, enable the “Live Photo” function. To do this, open the camera app and press the button in the top right corner of the screen (see the images below). Next, capture the shot. Finally, while reviewing the image in your photo gallery, swipe up to reveal a secret menu and select the “Long Exposure” option. This will convert your live photo into a foggy long exposure image.
Now, for those of you shooting with a DSLR or mirrorless camera, start dialing in your exposure by first adjusting your shutter speed. The first thing you want to determine for this kind of shot is how much motion you want to capture and the shutter speed will determine that.
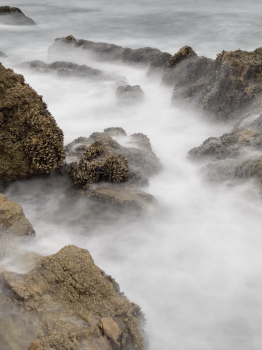
The motion rendered in the iPhone with “Live Photo” enabled, which creates a smoothed out, foggy-looking still using video images, is equivalent to a 10-30 second exposure on a DSLR or mirrorless camera. If you want less movement in the water, start with a one-second shutter speed and go from there. Once you’ve determined the shutter speed for artistic effect, dial in your aperture and ISO to balance out the exposure. You’ll probably need to stop down the aperture to compensate for the extra light coming into the lens with a slow shutter speed, and the ISO will likely need to be set at 100 or lower, depending on your setup. If it’s really bright out, you might also need to use an ND filter to further reduce the amount of light reaching the sensor.
How to Edit a Long Exposure Photo with Lightroom (Mobile or CC)
Now, it’s time to edit our long exposure photo. I’m using Lightroom CC on my desktop, which is identical to the Lightroom mobile app. I chose the desktop version in this instance to make everything easier to see in the video.
Step 1: Load the Photo into Lightroom (Mobile or CC) and Make Basic Adjustments
Load the photo into Lightroom and press “E” to open the Edit Module. From there, you’ll need to make your adjustments. Here are the adjustments I made alongside the reason for making them.
- Convert to Black and White: I clicked the “B&W” button in the top right corner of the Edit Module to convert the image to a black and white photo. Whether you choose to edit your photo in color or or in black and white is up to you. I thought this particular photo would look nice with a black and white edit.
- Exposure (-1.21): I lowered the exposure a bit to reveal more detail and texture in the mist.
- Point Curve: I selected the point curve (not to be confused with the tone curve, although they can be stacked together) and made the following adjustments in order to lift the highlights and darken the shadows to create a bit of contrast. We can also use the “contrast” slider, but I like to leave that to fine tune my adjustments at the very end.

- Blacks (+45) and Shadows (+36): I lifted the blacks and shadows to preserve detail in the rocks and rock formations.
- Highlights (-40) and Whites (+21): I pulled down the highlights to keep a little more detail and raised the white point a bit to allow the stronger highlights in the water to really stand out.
Step 2: Make Adjustments to the Black and White Mixer
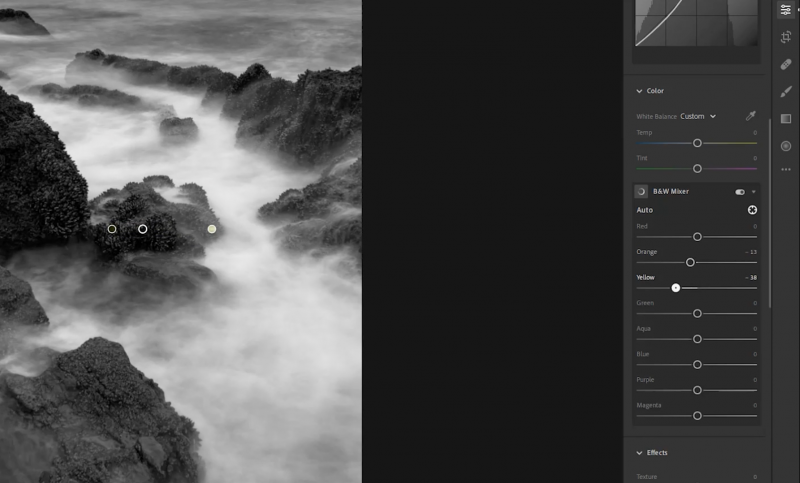
Even though we’re editing in black and white, we can still make adjustments to the “colors” in the image using the Black and White Mixer. If you don’t know what colors are in the photo, you can click on the Target Adjustment tool and then click and drag over the image to see which colors are affected in a given area. You can see the adjustments I made in the image above.
Step 3: Edit with Effects
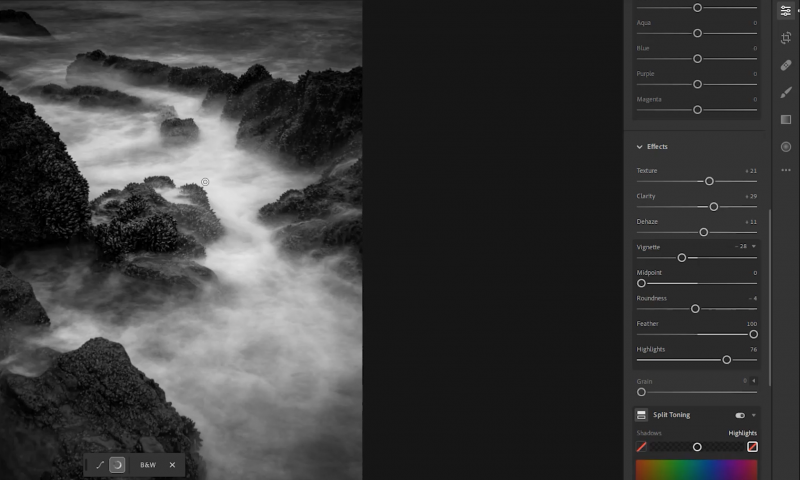
Here are the tweaks I made in the Effects panel as well as my reasons for making them.
- Texture (+21): I added texture to increase the level of detail in the image.
- Clarity (+29): I boosted the clarity to add mid-tone contrast.
- Dehaze (+11): As its name suggests, dehaze helps to add contrast and minimize the haze you might find in a landscape photograph. It’s a fun tool to play around with and it produces interesting effects, but be careful to not go overboard when using it.
- Vignette (-28): I like to use radial filters to create custom vignettes in Lightroom, but because it’s not included in the free version of the Lightroom app, we can still use the vignette slider. Again, be careful not to go too far when applying this effect. If you click on the little asterisk next to the vignette slider, additional editing tools will drop down, including Midpoint (0), Roundness (-4), Feather (+100), and Highlights (+100).
Once you have a look that you like, you can create a preset to minimize editing time (if you’re editing more than one image), or you can bypass the process and purchase a professionally designed preset.
Final Image: Before and After
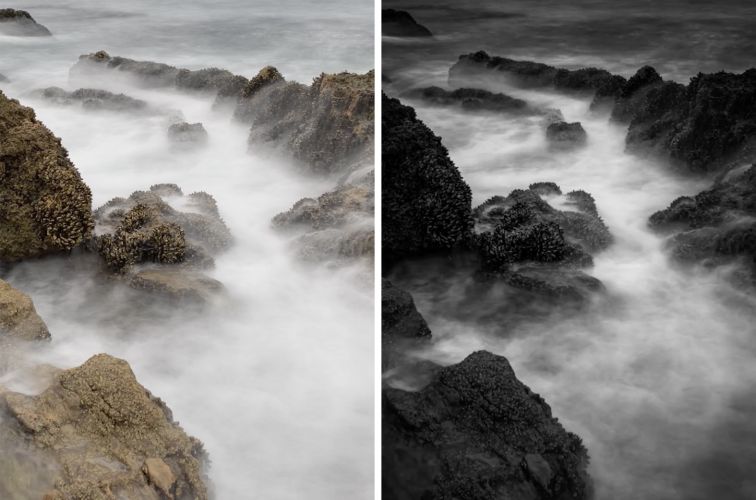
Conclusion
We hope you enjoyed this video and lesson on how to shoot and edit a long exposure photo with your iPhone.
Popular Posts
How to Remove Censored Parts from Photos With 4 Methods
Remove unwanted objects from photos free without impacting the background!
Jihosoft photo editor software helps you emphasize what’s interesting in your photos by removing distracting objects seamlessly.
The easiest two-in-one free video trimmer and joiner software
1 Cut video and audio without decreasing the quality
2 Easy to use, fast import and quick output
3 Accurately control every second of the range for cutting
4 Support various video and audio formats
5 100% clean and free video cutter
The easiest two-in-one free video merger and cutter software
1 Join multiple videos and audios at super fast speed
2 Support joining different formats of videos and audios
3 Support arranging the order of videos to be merged
4 Support cutting the videos before merging
5 100% easy-to-use, clean and free video combiner
Comments
Post a Comment