How To Remove Backgrounds Using Just The Brush Tool

Today I’m going to be doing a quick background removal edits.
Now I will say, I gotta be honest, I do not recommend this for everything and I would very rarely use it.
I would say I would only use this if I was refining a tiny little bit.
But it can be used to do full background removals as well with specific scenarios.
So let’s take a look at what the type of scenario would be where I could use this technique successfully.
Check out the image below…
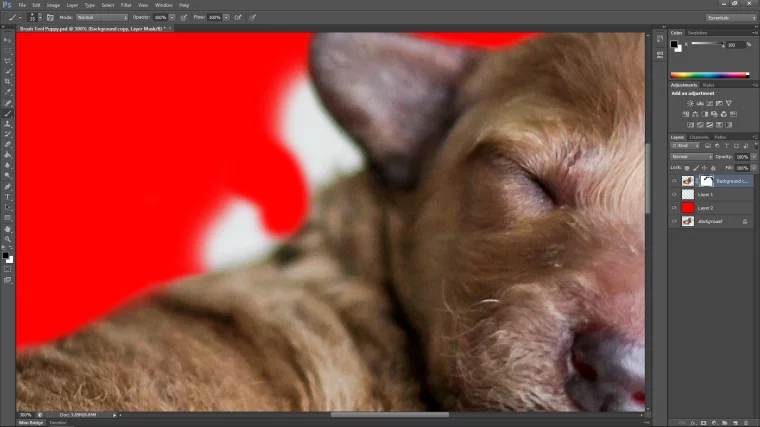
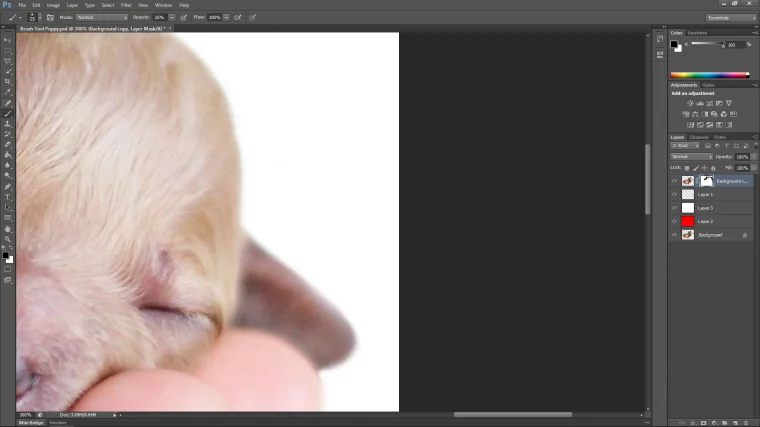
You can see that the edges of the image are not in focus!
This would be the scenario that this technique that you are about to learn would be very useful.
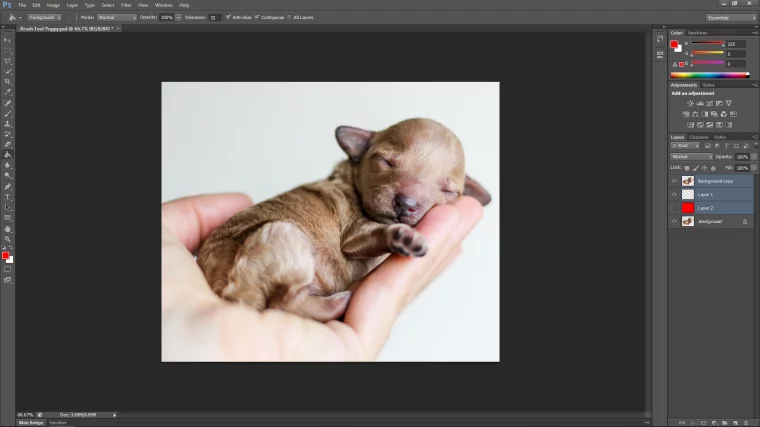
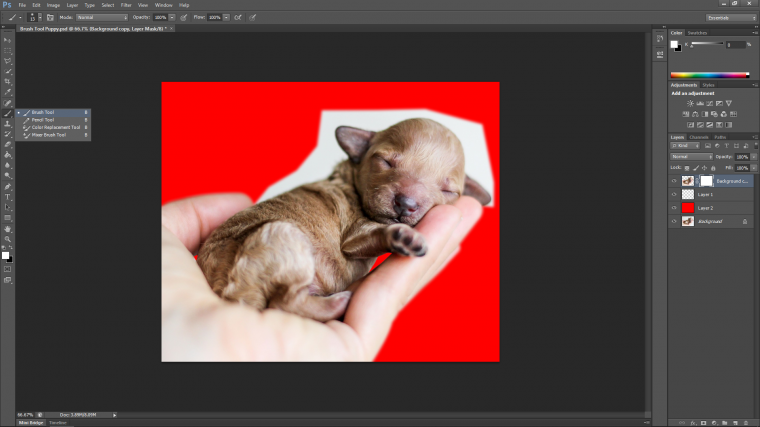
As you can see below I already have a prepared image.
So for scenario sake, we’ll just say that we were given the file to finish off or that we had already used the Pen Tool…
Not important for this tutorial, but let’s focus in on what is.
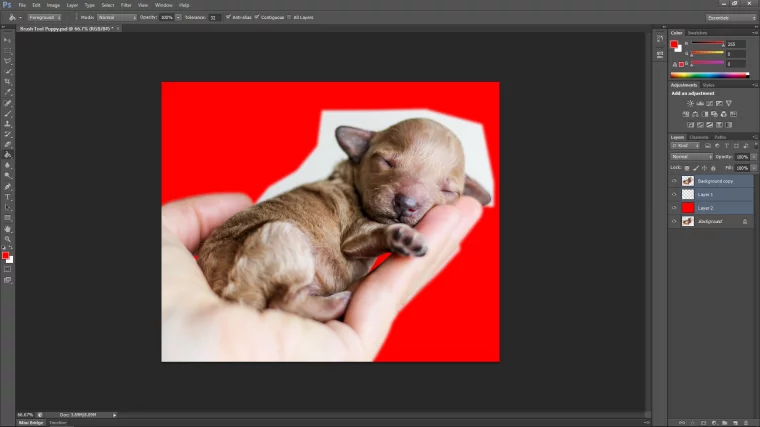
Note: I have the red background in place so it is easier for you to see.
The red background is not needed but if you want to add one to see better then no worries.
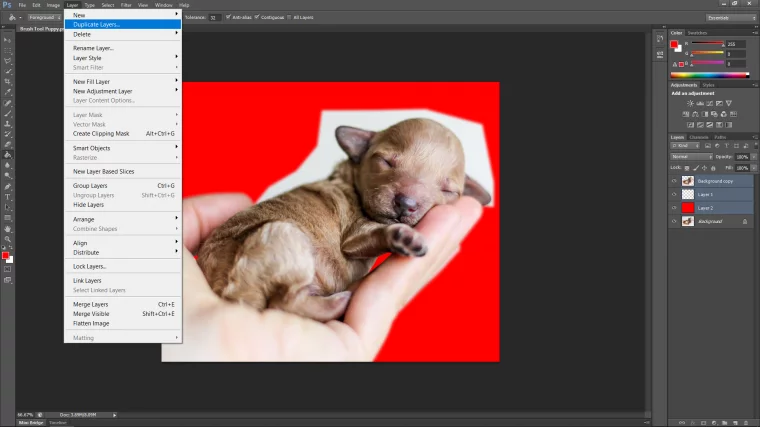
All you really need to do is go to Layer – Duplicate Layers
I’m already all set up and ready to rock.
So let’s get to it.
The first thing that I’m going to have to do is to create a mask.
So make sure that you have selected your top layer.
Look over to the right-hand side and click on the top layer.
That will be your duplicate layer.
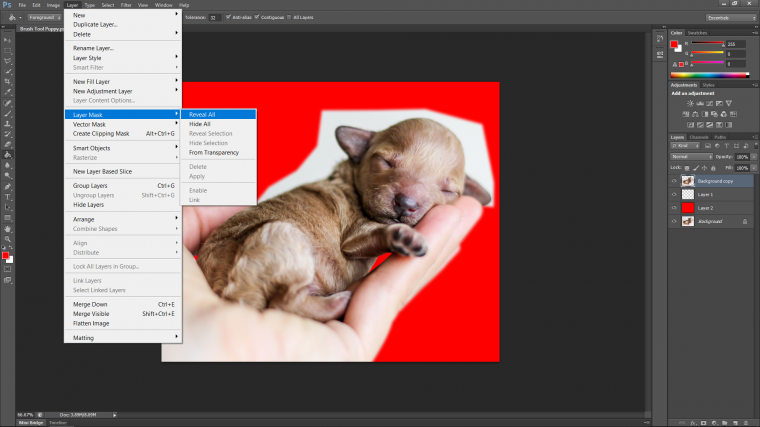
Go to Layer -Layer Mask – Reveal All
Now let’s get our Brush Tool Ready.
It’s on the left-hand side toolbar.
You can also press (B) on your keyboard for the shortcut.
Now that the mask is ready to go look to the layers panel on the right.
See your layer, there is now a white box beside it, click on that, it’s the mask.
So basically, when you paint on your image now with black while having selected the white box thumb nail.
You will be painting out your image so whatever you paint on will be hidden.
When you change then to white on your brush, it will paint it back in.
You can flip between white and black by double-clicking on the box indicating the color at the bottom of your left side toolbar.
The first thing you do is to make sure you are using a soft brush.
So at the top left-hand side, you will see the menus ‘File – Edit – Image…’ etc.
Just below that, you will see the brush options.
Click on the drop-down box in the second one.
You’ll see a load of brush options, make sure you are on the first brush option.
Then you paint out the background around the image you want to cut out.
You don’t have to be perfect here but you do have to make a good job of it
The edge will be a little hard but that’s ok, this is the first step only.
Note that while you are painting out.
The plus and minus keys on your keyboard will increase/decrease the side of your brush.
So change according to detail and complexity.
Hold your space bar to click and move around your object as you edit.
And (Ctrl + plus/minus) on your keyboard will let you zoom in and out of your image.

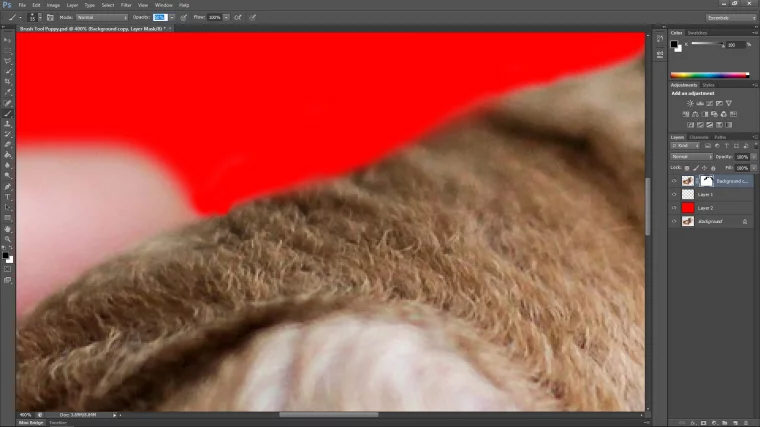
Now it’s just a matter of dropping the opacity on your brush and refining your edge.
I tried 50% to start with but I wasn’t too happy.
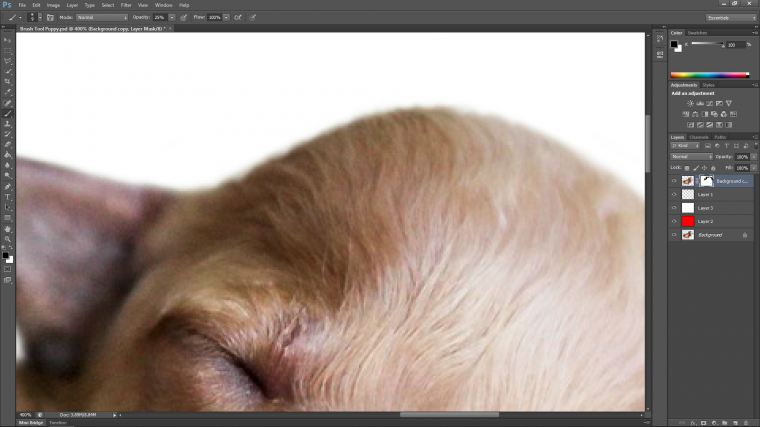
Also, I felt the red background was too harsh so I changed it to white.
As you can see the white is easier on the eye.
So just a quick tip on this.
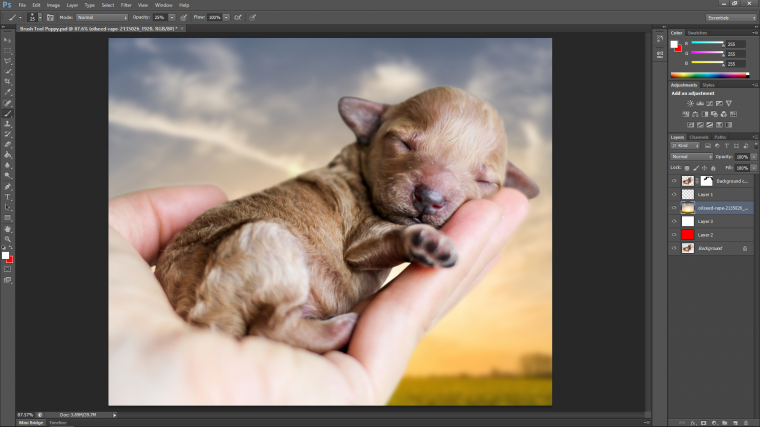
You can do this with the background you want in behind but I would advise using plain colors to start with.
I go between White, Red, Black to help me see my edge.
So the rest of my refining was done with a 25% opacity.
I didn’t click and drag the mouse, I made multiple fast clicks on my mouse to help build.
Also, I tried to make the edge follow the little shapes in the image.
Like the little hair bumps just to add a little bit of realism
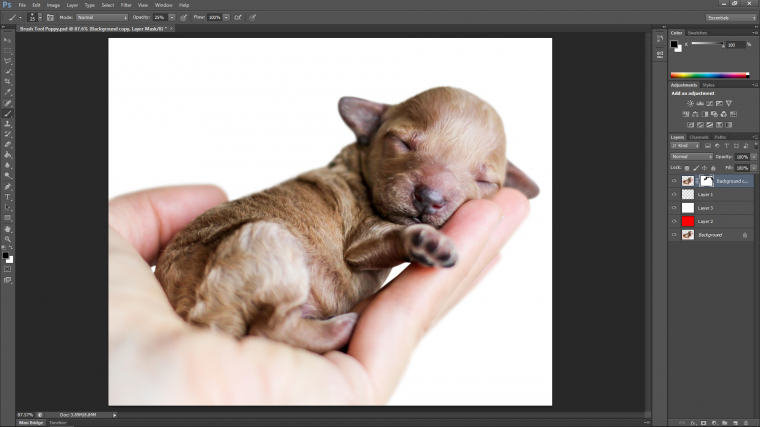
When I was done I popped my background in and saved up.
Hope you enjoyed, practice and you will get better and better.
Must Check Out Posts:
Erase unwanted objects and perfect your amazing photos!
Remove objects from photos with Photo Eraser is almost as easy as taking a shot. Now you can use this tool to erase undesirable objects from your pictures, such as tourists, watermarks, logos, texts, blemishes and other unwanted things without real photo-editing skills required at all.

The most powerful and professional data recovery software for Android that can restore deleted or lost contacts, photos, videos, audios, SMS, call logs, WhatsApp chat, Viber messages from any Android devices due to accidental deletion, virus attack, formatting. It supports all popular Android smartphones and tablets like Samsung, HTC, LG, Huawei, Motorola, Nexus, etc. In the meantime, you will be guided step by step if you never used this kind of tool before.

An all-in-one WhatsApp Manager which can be used as a complete solution to backup, restore, recover and transfer WhatsApp chat history, contacts, call logs, pictures, videos, audio messages and all other WhatsApp attachments on Android & iPhone.


Comments
Post a Comment