How To Identify And Remove Distractive Elements In Photoshop

What we are going to be looking at today is how to identify what could be considered to be a distraction.
Once you get an eye for these types of things you will start noticing them everywhere.
Your eye for quality images will become much more tuned in.
Now some people can argue with what is a distraction and what is not.
I put it down to this…
What I feel myself noticing that doesn’t add to the overall image.
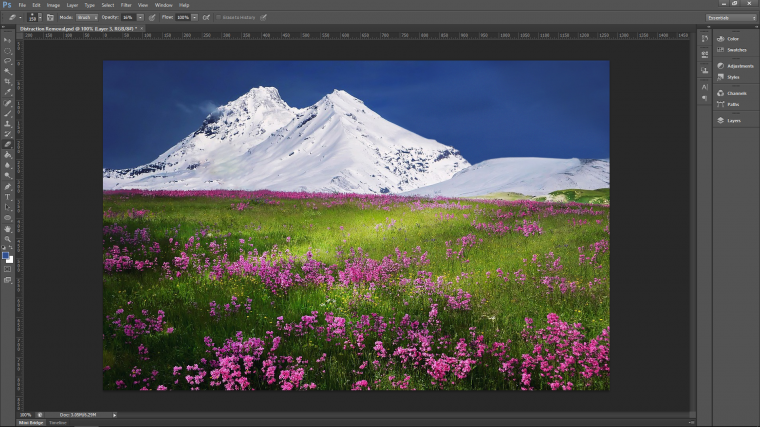
So let’s take a look at an image where I think an element within the image is a distraction.
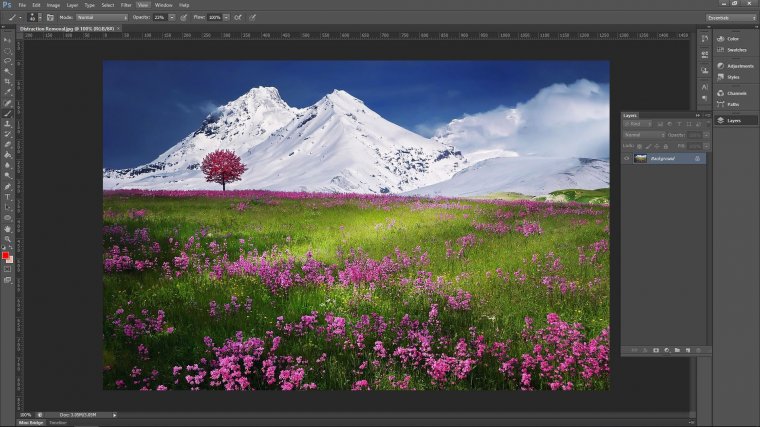
Ok so looking at this image what do you think is the main focus of the image?
And now, what do you think is an element within the image?
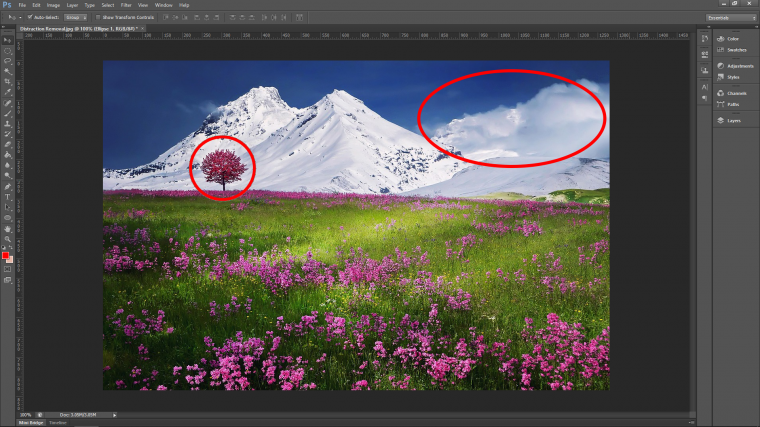
So for me, there is actually 2 elements that I think take away from the image.
Number 1 is the tree.
My reasons for this is because I feel the mountain is the main focus.
The grass and flowers lead your eye from the bottom right up to the mountain.
Number 2 is the cloud on the right-hand side.
My reasons for these are as I said, I would like to have this image remain simple, grass to the mountain for a feeling of epicness.
I feel my eye is drawn away from that with the tree first, then the cloud.
The thing is, if this is your aim (as a photographer), then it’s all good, I’m not saying the tree or the cloud is wrong.
You have to remember that this is subjective to how I want it with my current thoughts and feelings.
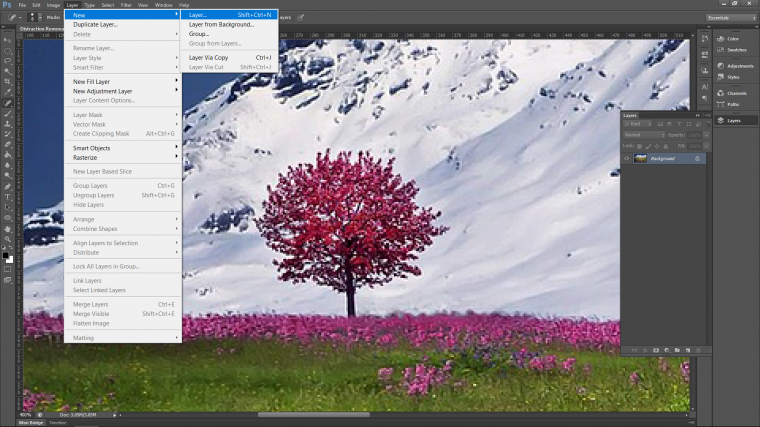
So let’s deal with the tree first.
Press Z on your keyboard to open up the Zoom Tool.
Click over the tree until you get up close.
Holding the space bar will enable you to click and drag the tree into position.
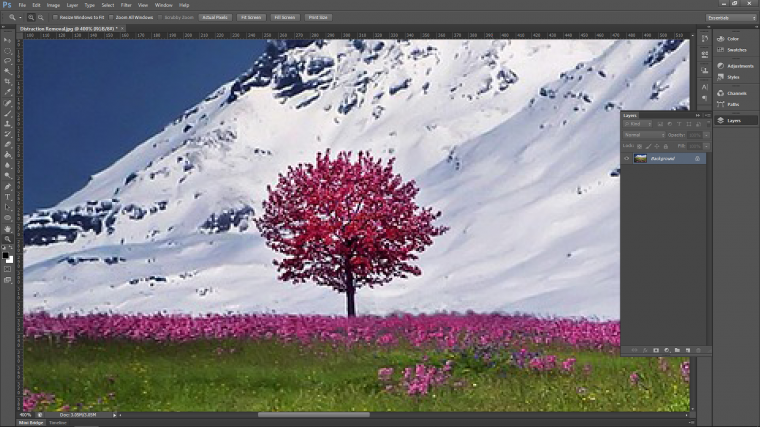
With this type of element, it is within the mountain, so there’s no sharp lines or edges to deal with.
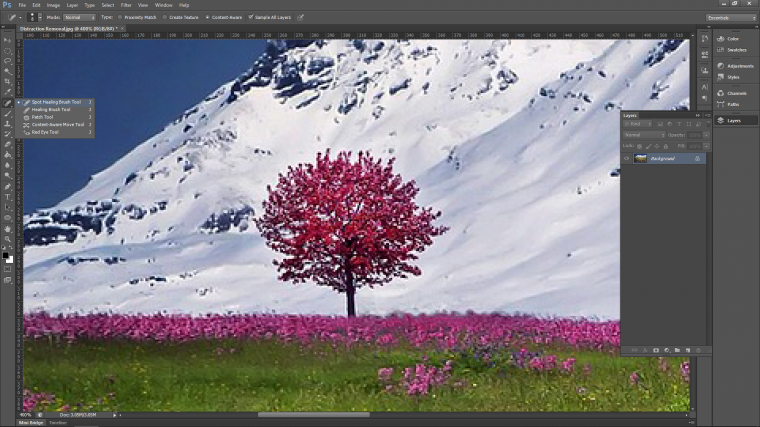
This is simply removed by selecting the Spot Healing Brush.
But you have to make sure you have ‘Content-Aware’ checked off.
You’ll find that option at the top left-hand side.
Just have a look along and you’ll see it and then click on the circle beside it to activate that option.
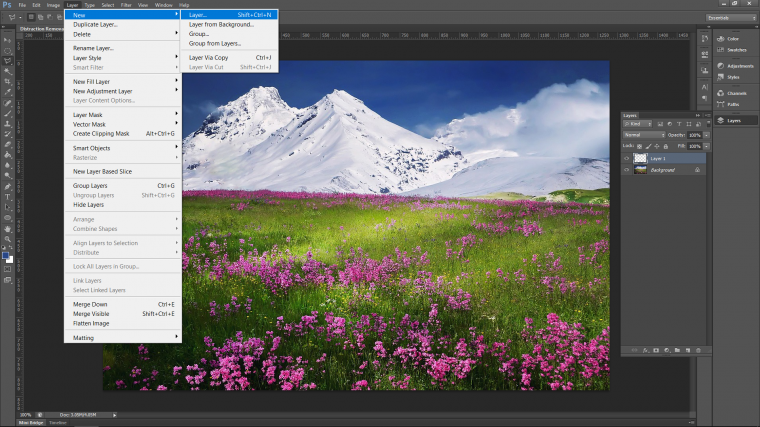
Now all you got to do is to just click and paint over the top of the image, but before you do that create a new layer!
Then click and paint, you will have to go over a few times to get a satisfactory result most of the time.
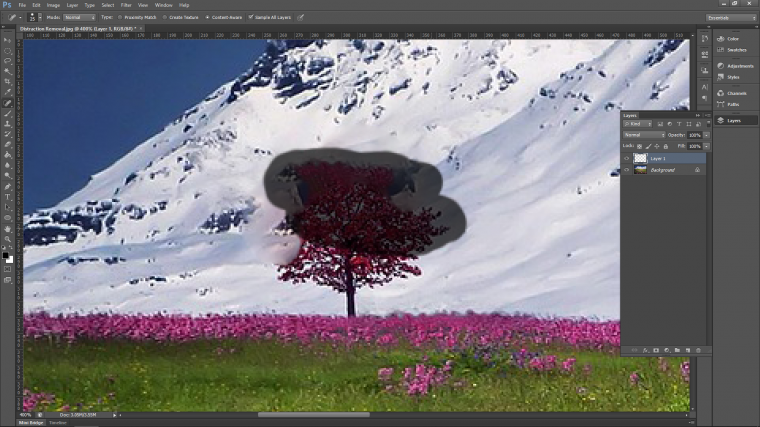
But the results are generally pretty good!
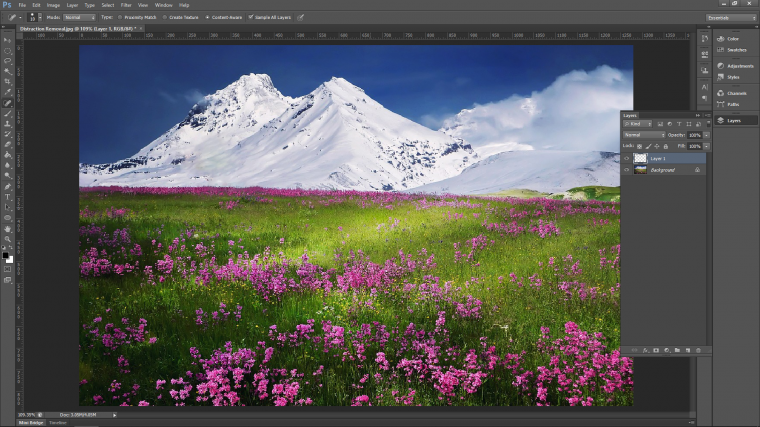
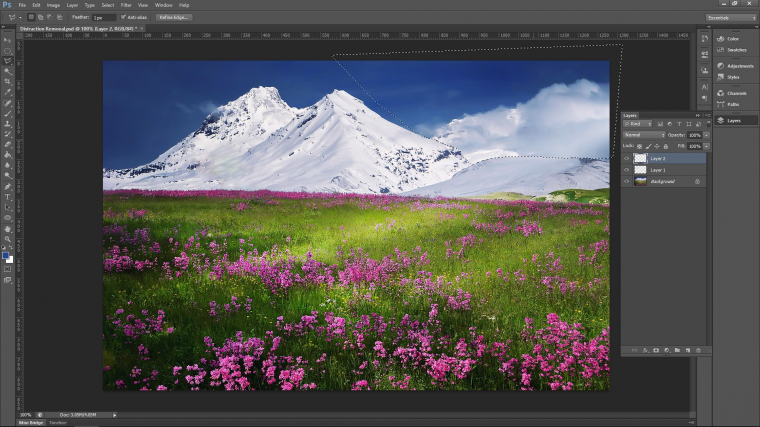
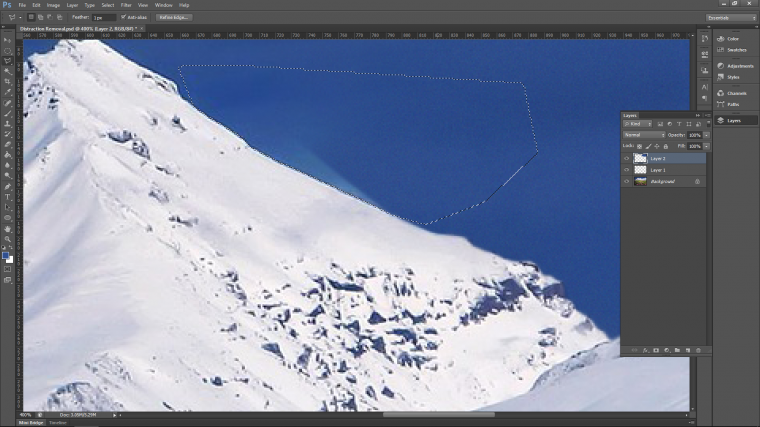
Next let’s take a look at this cloud on the right.
Open up your Polygonal Tool.
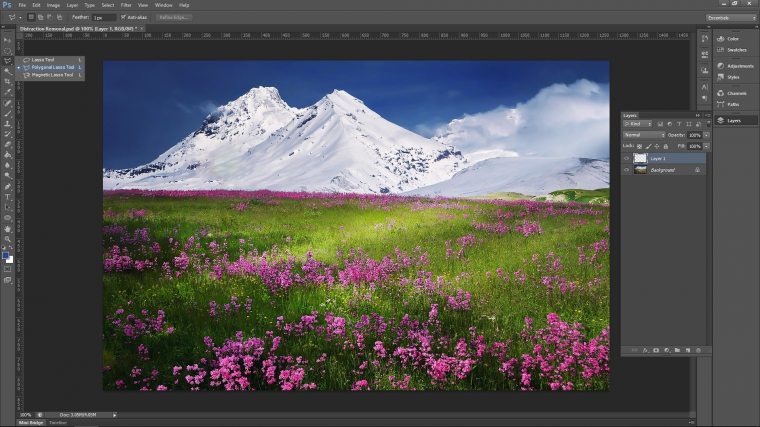
Again create a new layer.
Next, you use the tool to click around the are that you want to remove.
When it comes to the likes of the mountain you can zoom in with the plus and minus keys on your keyboard while holding Alt.
Then with small clicks draw around the mountain edge so it will look real.
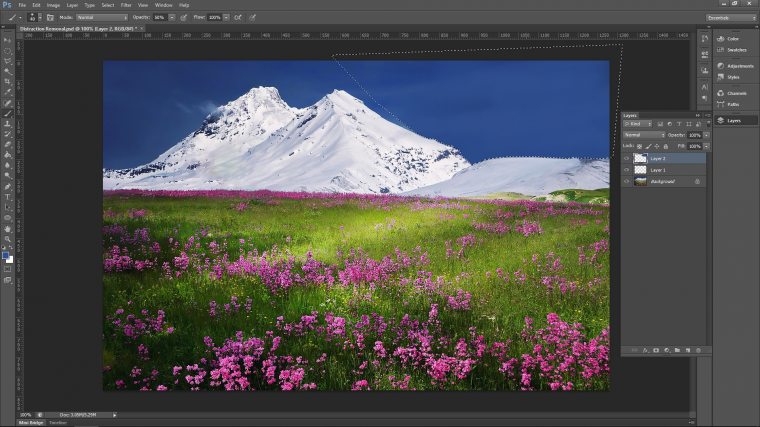
Now select your brush tool, let’s paint over the area but you have to do a few little things first.
First, hold Alt and you will see a little eye dropper appear.
Then click on an area really close by and paint over the selected area with an opacity of 50% for your brush. (you’ll see that option just below ‘Window’ in the top menu)
Then you can keep clicking to build it up.
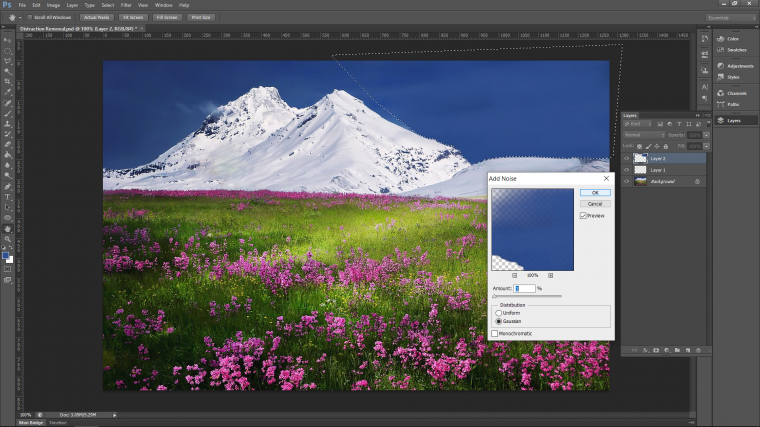
It won’t look so real so we have to add some grain.
You do that by adding noise.
You’ll find that in ‘Filter – Noise – Add Noise’
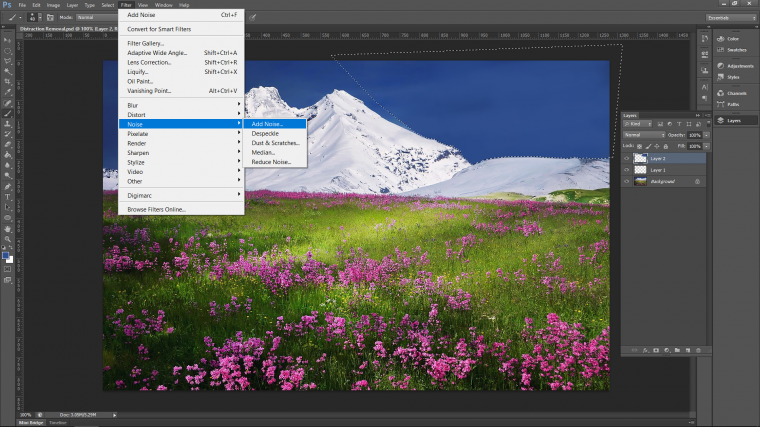
When the panel appears select 1 on the amount and click Ok.
There will be areas you may have missed to just redraw a selection.
Now using your Clone Tool.
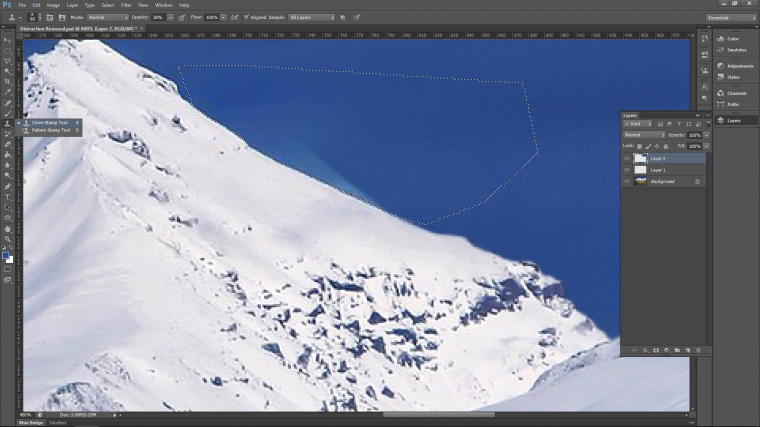
Hold Alt again similar to the Brush Tool, but this time you are sampling an area to paint with.
That will cover the area up nicely, and then you will be done and it would have only taken a little bit of time.
So the main point of this tutorial was not to teach you the Spot Healing Brush or Clone Tool, there’s plenty out there on those.
But it is to look at an image objectively and try to identify what is a distraction.
Now you know you’ll start seeing them everywhere, good! you’re starting to think on a different level now.
Enjoy your new skill 🙂

Must Check Out Posts:
Erase unwanted objects and perfect your amazing photos!
Remove objects from photos with Photo Eraser is almost as easy as taking a shot. Now you can use this tool to erase undesirable objects from your pictures, such as tourists, watermarks, logos, texts, blemishes and other unwanted things without real photo-editing skills required at all.

The most powerful and professional data recovery software for Android that can restore deleted or lost contacts, photos, videos, audios, SMS, call logs, WhatsApp chat, Viber messages from any Android devices due to accidental deletion, virus attack, formatting. It supports all popular Android smartphones and tablets like Samsung, HTC, LG, Huawei, Motorola, Nexus, etc. In the meantime, you will be guided step by step if you never used this kind of tool before.


Comments
Post a Comment